
5 min read
How to Add An Image Into Your Sanity.io Blog
Hey there, tech enthusiasts! If you've been scratching your head trying to figure out how to add images to your blog content (specifically Sanity.io), you're in the right place. Let's break it down step by step.
Before we start, you'll need:
- A bit of Next.js knowledge under your belt
- A Sanity.io account (if you don't have one, go grab one!)
Step 1: Starting From Scratch
Look, we could reinvent the wheel, but why bother? There's a fantastic GitHub repo that'll give you a head start: Next.js x Sanity Starter Repo. Go ahead and clone it, then follow the setup instructions in the README.md. Trust me, it'll save you a ton of time and get you on the right path.
Step 2: Adding Images
Navigate to your blog content schema file. For us, it's under sanity/schemas/documents/post.ts. Here's the magic sauce - add the snippet below to the defineField that has the name "content":
1{
2    type: "image",
3}
Your code should now look something like this:
typescript
1defineField({
2      name: "content",
3      title: "Content",
4      type: "array",
5      of: [
6        { type: "block" },
7        {
8          type: "image", // add here
9        },
10      ],
11    }),
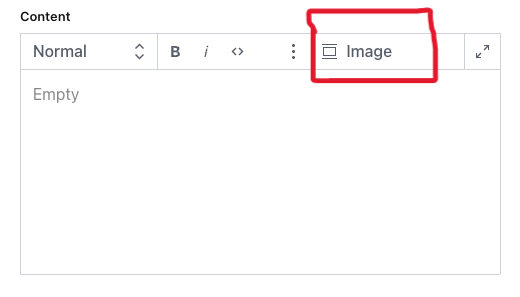
What does this do? It adds the "insert image" option to your Portable Text Editor toolbar.
Step 3: Displaying Images
We're in the home stretch, but hold on - we still need to actually display these images. Otherwise, you'll just have mysterious blank spaces in your blog posts. Not ideal.
Head over to your portable-text.tsx component and install this package: npm i next-sanity-image.
Don't forget to import it along with urlForImage function!
tsx
1import { Image } from "next-sanity/image";
2import { urlForImage } from "@/sanity/lib/utils";
Now, in your CustomPortableText function, in the const components: PortableTextComponents, we need to tell it how to render images.
Here's how (feel free to specific your own Image width and height):
tsx
1types: {
2      image: ({ value }) => {
3        const imageUrl = urlForImage(value)?.height(400).width(700).url();
4        return imageUrl ? (
5          <Image
6            src={imageUrl}
7            alt={value.alt || "Image"}
8            height={400}
9            width={700}
10            className="flex items-center justify-center rounded-xl"
11          />
12        ) : (
13          <div
14            className="flex items-center justify-center py-4 rounded-lg bg-gradient-to-t from-emerald-800 via-emerald-700 to-emerald-500"
15            style={{ height: 400, width: 700 }}>
16            <span className="text-white">
17              An error occurred while fetching the image
18            </span>
19          </div>
20        );
21      },
22    },
What's happening here? We're defining a type object with an image property. This function takes the image value, uses urlForImage to set the height and width, and then either renders an <Image> component or throws up an error message if something goes wrong.
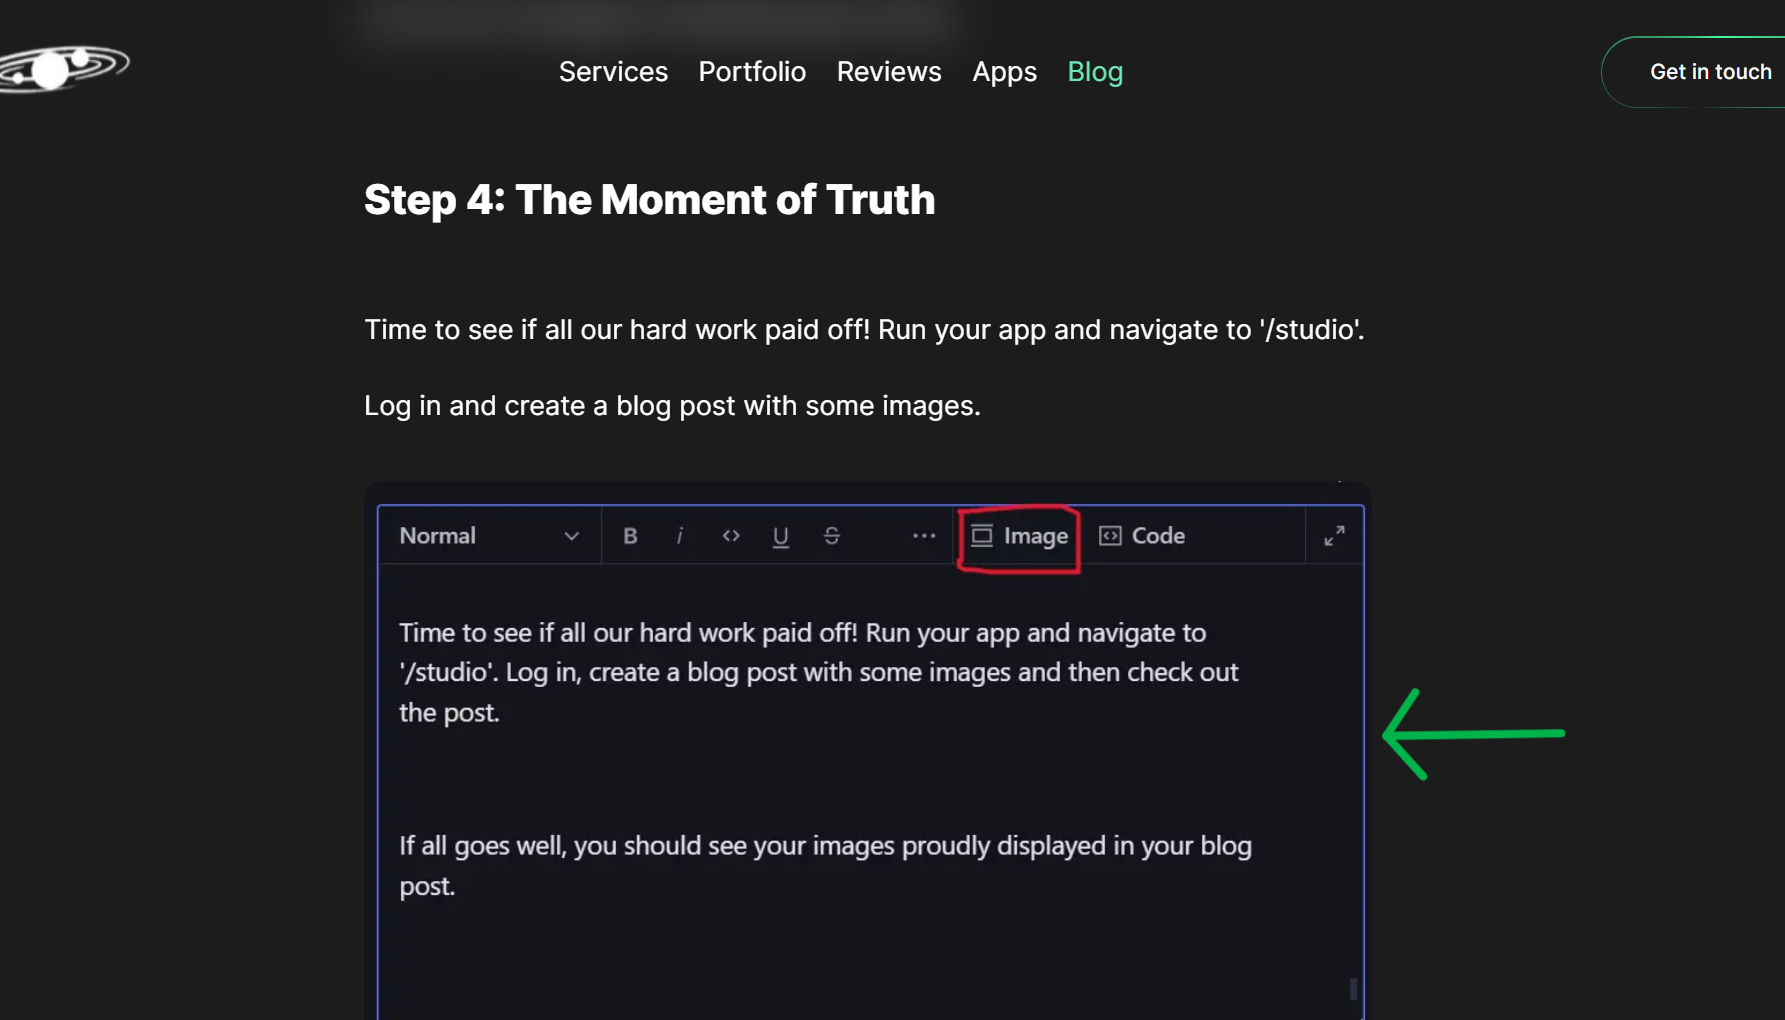
Step 4: The Moment of Truth
Time to see if all our hard work paid off! Run your app and navigate to '/studio'.
Log in and create a blog post with some images.
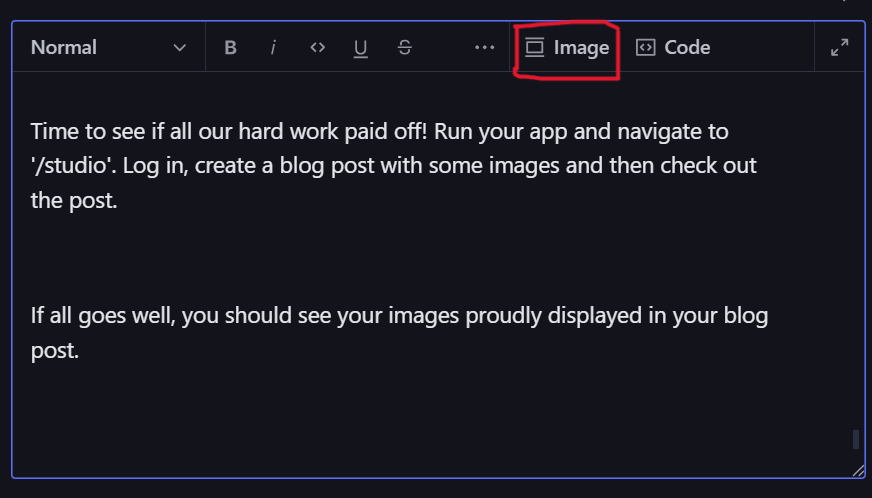
Then publish and then check out the post. If all goes well, you should see your images proudly displayed in your blog post.
Success! And there you have it, folks! You're now equipped to add eye-catching images to your Sanity.io powered blog. Happy blogging, and may your content always be visually stunning!
Don't forget to share this guide with anyone who might be struggling with the same issue. Until next time, keep coding and stay curious!